Objectives
This document explains the AWS AMI build procedure of the NiceDCV 2023 server on Windows server 2022 for the AWS x86_64 instances. In this AMI, the NiceDCV is configured and automatically started at the Windows instance launch time. At launch time, the user can create a DCV user with their own password. After the instance is started, the user can login the DCV session using the NiceDCV client.
Install NiceDCV server
- Launch a Windows Server 2022 instance in AWS. The c6i.xlarge instance is recommended. After the instance is started, login the Windows instance using RDP.
- After login, download and install the NiceDCV Virtual Display Driver.
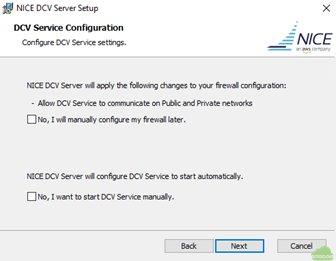
- Install NiceDCV Server 2023. During installation, allow the DCV service in the firewall and configure the automatic start of the DCV service.
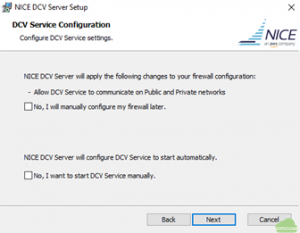
Check that the manual creation of the console session. The console session will be created manually by theUser-datascript at the instance launch time.
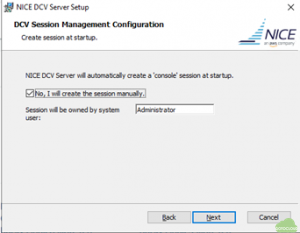
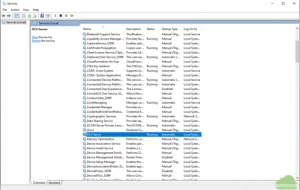
- Check the DCV server is started automatically in the Windows Services of the Task manager.


Enable the session-storage
Session-storage is a folder on the NICE DCV server that clients can access when they’re connected to a specific NICE DCV session. By the session-storage service in the DCV server, the file transfer between the client and the server during the DCV session is connected.
- Create a folder which will be used for the session storage-storage. For example,
C:Userssession-storage - Open the Registry Editor and navigater to the
HKEY_USERS/S-1-5-18/Software/GSettings/com/nicesoftware/dcv/session-management/automatic-console-sessionkey and select the storage-root parameter. - In the navigation pane, open the contect menu (right-click)
session-management/automatic-console-session. Then chooseNew, String. And set theNameasstorage-root - Open the
session-rootparameter and set the value as the folder name which was crated in the above such asC:Userssession-storage - To start the session-storage, specify the
--storage-rootoption at the session creation time.
Setup the snapshot using EC2Launch V2
To create a AMI, install the latest updates and configure the EC2 Launch V2 settings.
- Install the latest update in the Windows Server 2022.
- From the
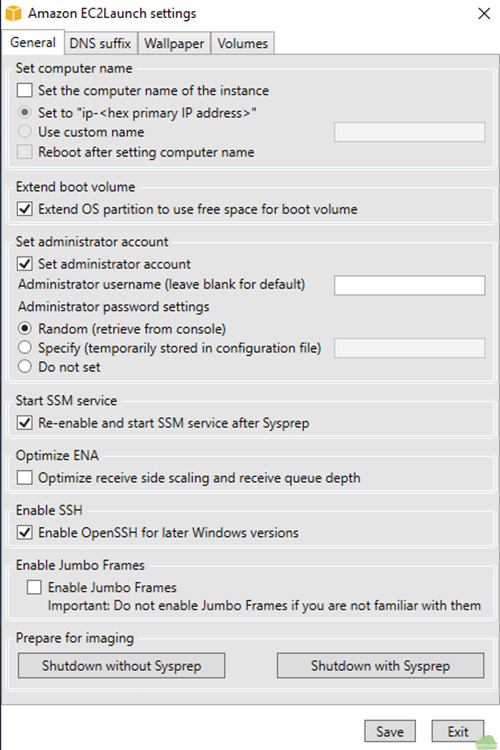
Start menu, run theAll Programs -> EC2Launch settingsand configure parametes as following 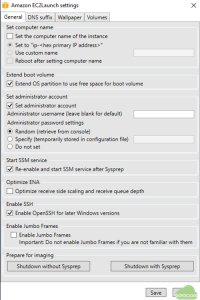
-
- Check the
Extend OS partionto use all disk spaces of the instance - In the
Set administrator account, select theRandom passwordfor the Administrator. Using the ssh key, the random password can be decrypted after the instance is started - Check the
Enable SSHparameter to log in using the ssh command to the Windows Power Shell
- Check the
- After configure parameters, click
Shutdown with Sysprep. Create an AMI using the stopped instance.
Launch an instance with User-data
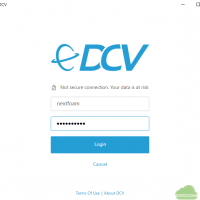
To log in to the DCV session after the Windows server is started, the DCV user should be configured in the User-data field at an instance launch time. The example of User-data is following
<persist>true</persist>
<script>
net user userid ComplexPassword /add
net localgroup administrators userid /add
“C:\Program Files\NICEDCV\Server\bin\dcv.exe” create-session 0 –owner “userid” –name “sessionname” –storage-root “C:\Users\session-storage”
</script>
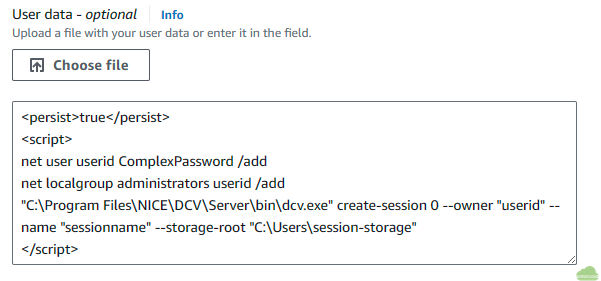
In the above script, userid with the ComplexPassword is created in the Windows server and the sessionname DCV session is automatically created. The user can login as the userid with password using the DCV client. The password should be satisfied for the Windows security policy.
And, in the security group setting, 8443/tcp should be allowed in the in-bound connection.